This is a quick ‘n’ dirty guide to using SVG (vector graphic) images in your layouts. Being a structured text definition of your image, you can style the images with CSS and define areas that can be clicked. Kitsun supports this by allowing you to style according to the fields of your card, and automatically setting up support for advancing cards as right/wrong using clicks.
So let’s get started!
1. Create a New Template
First we need a custom template to hold the question and expected answer. For SVG we need an additional field that holds a list of IDs that are considered valid click answers for the card. The IDs will also show up when using {{enteredanswer}}, so they should look presentable. A downside is that spaces are not allowed.
Anyway, let’s create three fields in a template called SVG Tutorial under Tools>Templates and save it:

2. Create a Layout
Then we create the actual SVG layout (the front/back pair asking you the question) under Tools>Layouts. Choose the template and make a new layout SVG Layout.
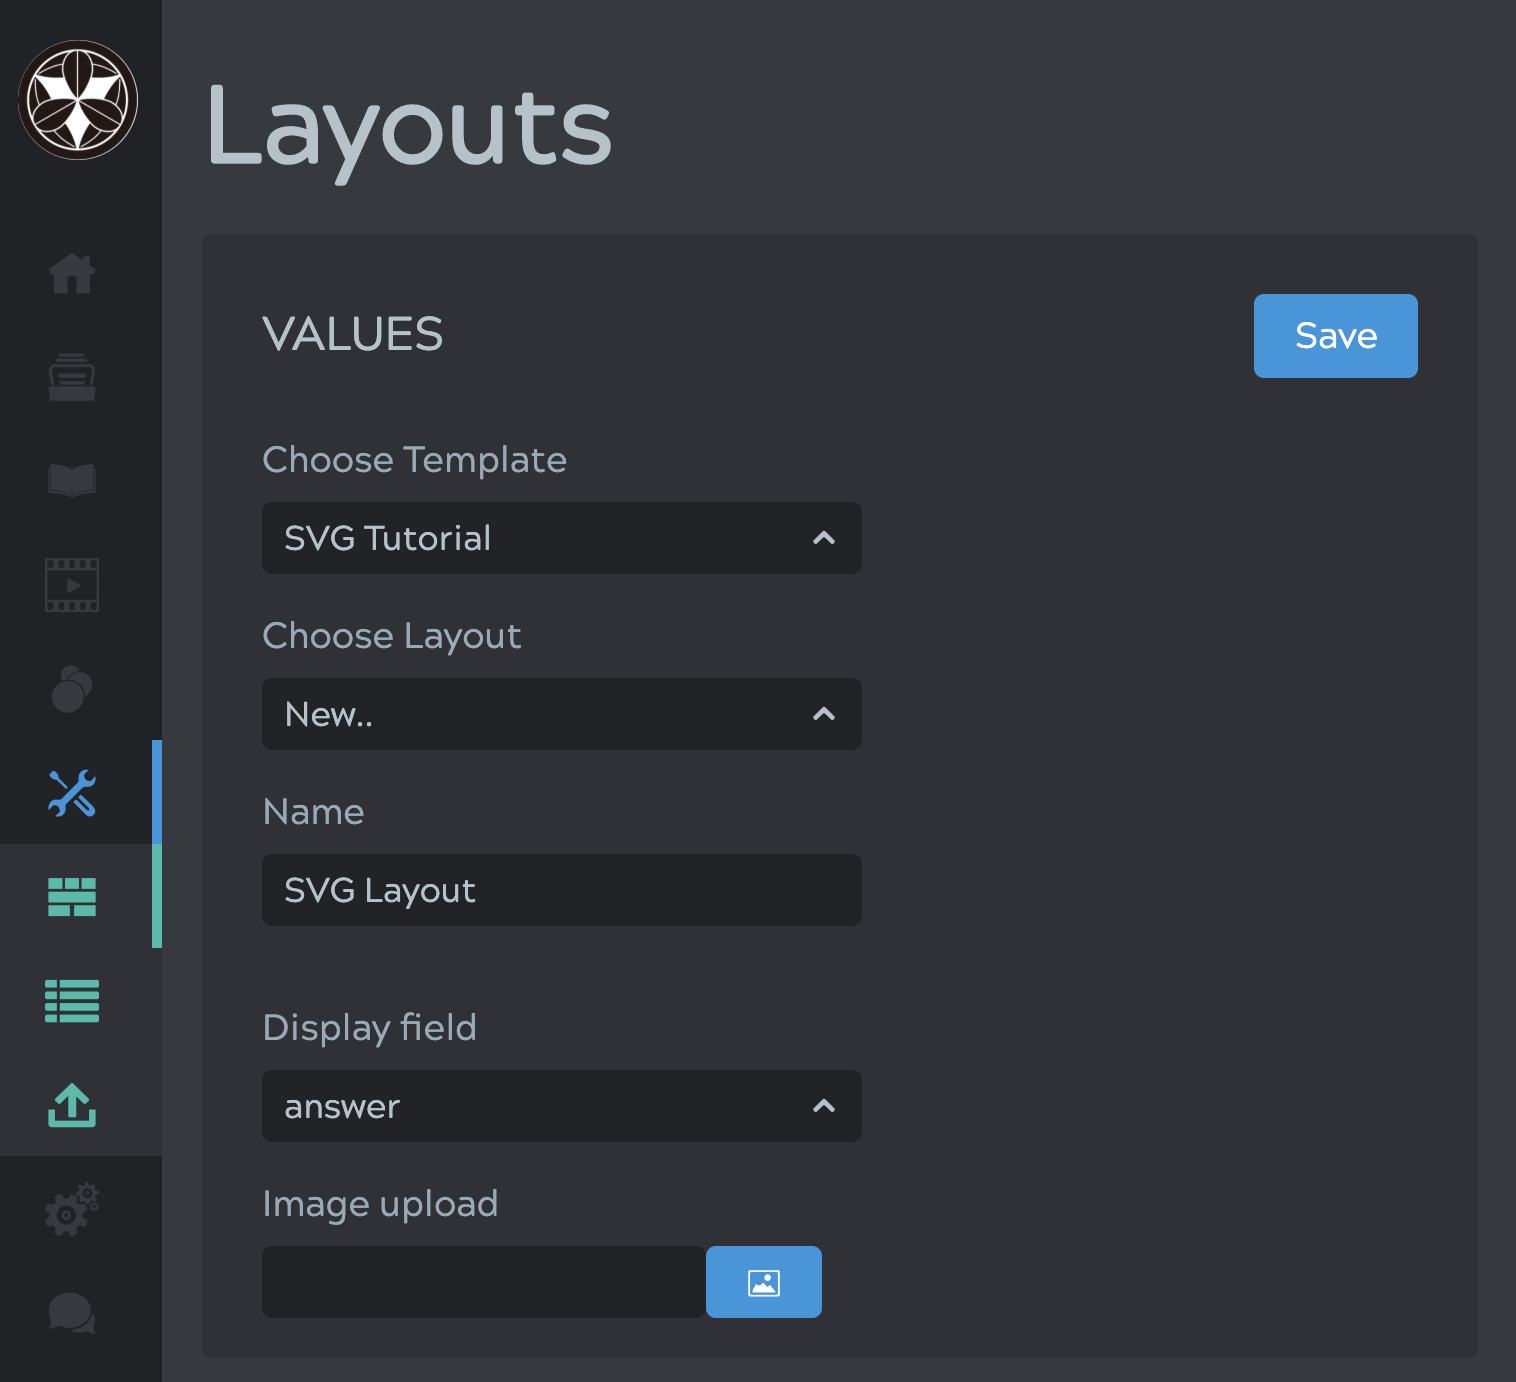
On the bottom of the layout screen there are three text boxes we need to fill: Front, Back, Styling.
3. Create the SVG
First we need an SVG image. For simple graphics they can be written by hand, but Inkscape or similar tools can be used to edit them visually. For many topics you can look online for SVGs, for example on Wikipedia there are tons for maps, etc.
We will use the following:
<svg xmlns="http://www.w3.org/2000/svg"
     xmlns:xlink="http://www.w3.org/1999/xlink"
     xml:space="preserve"
     viewbox="0 0 18 6" id="MySvg" version="1.1">
  <circle id="Purple" cx="3" cy="3" r="3" class="purple"></circle>
  <circle id="Blue" cx="9" cy="3" r="3" class="blue"></circle>
  <circle id="Orange" cx="15" cy="3" r="3" class="orange"></circle>
</svg>
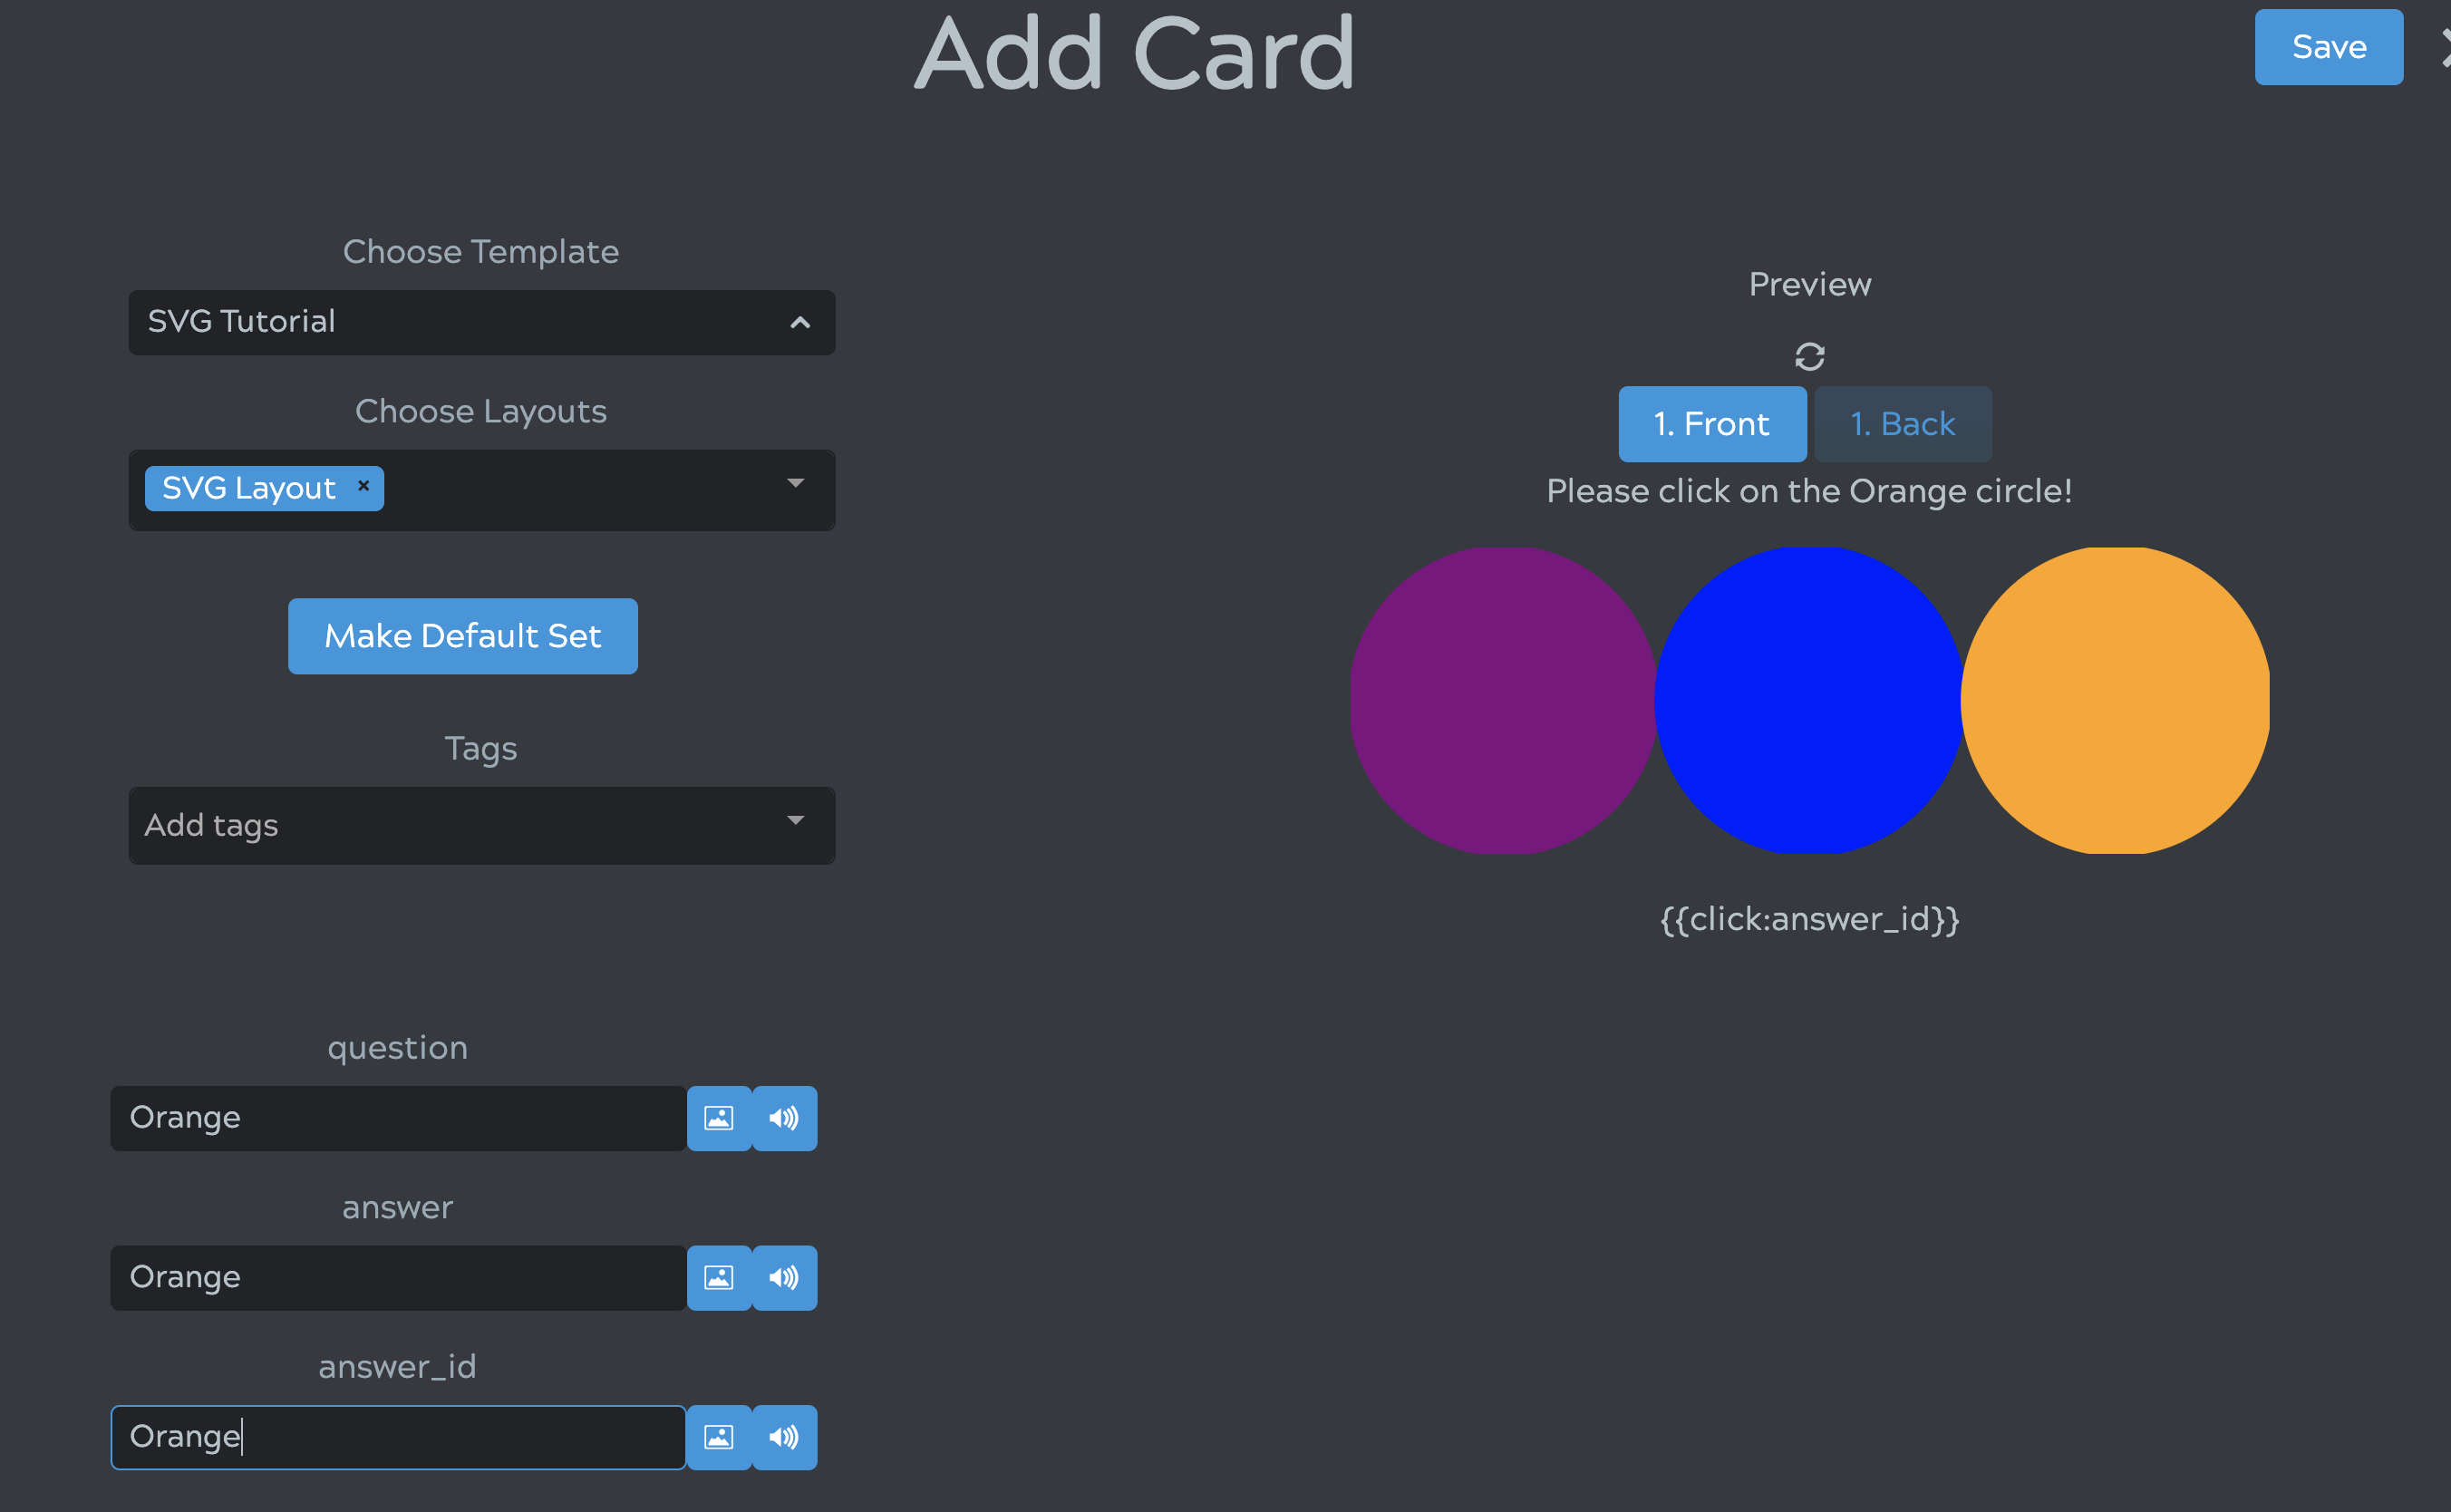
Which looks like this (with styling):

With this we want to make a simple quiz: click the requested color.
4. Define the Front and Back of Your Layout
Next we put the SVG in our layout.
The frontside:
<div>
  Please click on the {{question}} circle!
</div>

<div class="svg_wrapper">
<svg xmlns="http://www.w3.org/2000/svg"
     xmlns:xlink="http://www.w3.org/1999/xlink"
     xml:space="preserve"
     viewbox="0 0 18 6" id="MySvg" version="1.1">
  <circle id="Purple" cx="3" cy="3" r="3" class="purple kitsun-click"></circle>
  <circle id="Blue" cx="9" cy="3" r="3" class="blue kitsun-click"></circle>
  <circle id="Orange" cx="15" cy="3" r="3" class="orange kitsun-click"></circle>
</svg>
</div>

{{click:answer_id}}
The {{click:answer_id}} part specifies that a click is expected as the answer, and the correct answer(s) are listed in the answer_id field. Multiple values can be separated by commas, clicking any of them will do.
Parts of the SVG that can be clicked have the kitsun-click class. Their id is used for the comparison if the click was correct.
That’s already it for the front, setting up the SVG with the correct class and IDs is the trick.
The backside:
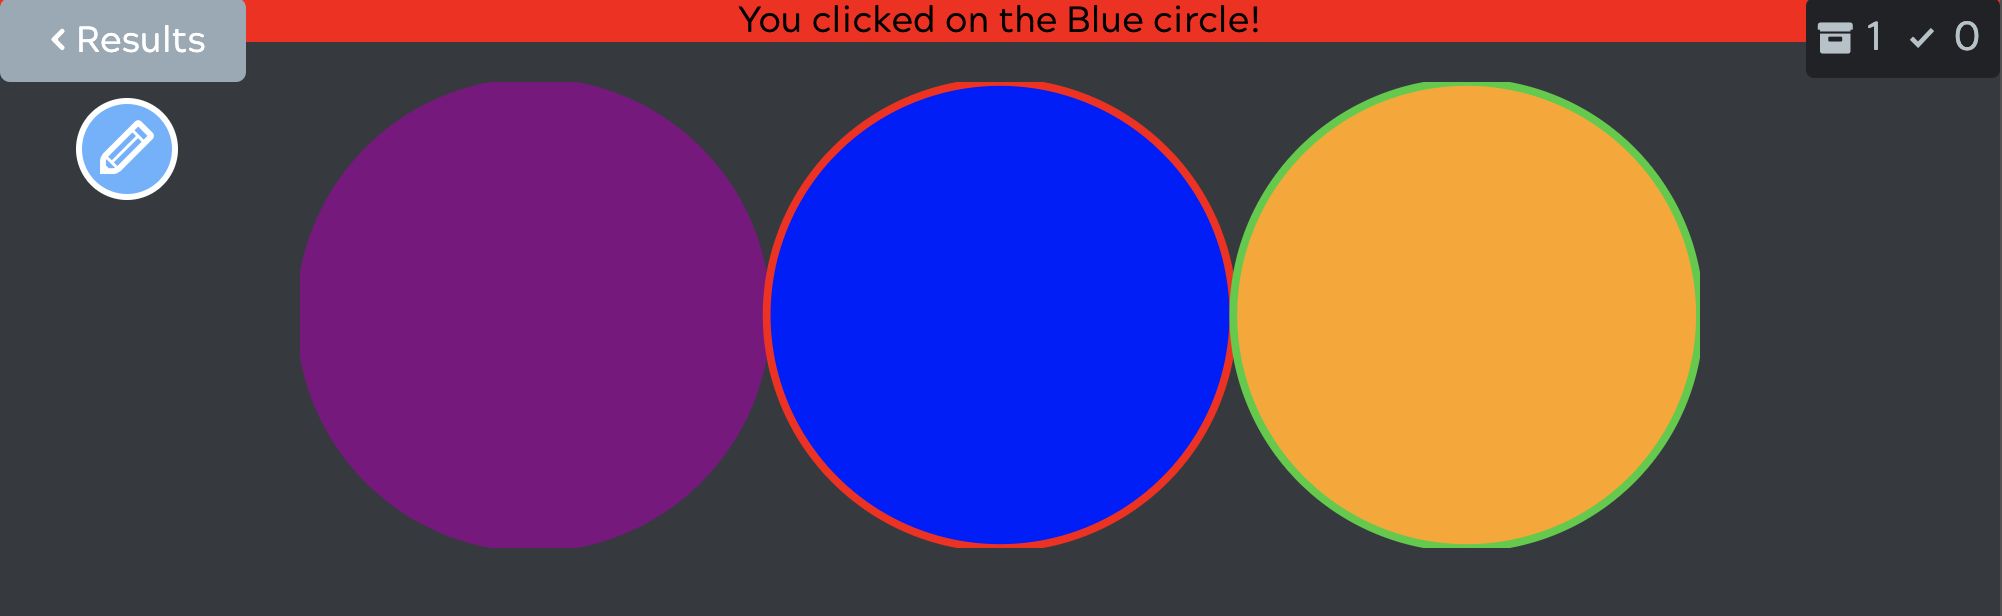
<div>
  <div class="inreviews">
    You clicked on the {{enteredanswer}} circle!
  </div>
  <div class="inlessons">
    Click on the {{answer}} circle in the reviews!
  </div>
</div>

<div class="svg_wrapper">
  <svg xmlns="http://www.w3.org/2000/svg"
       xmlns:xlink="http://www.w3.org/1999/xlink"
       xml:space="preserve"
       viewbox="0 0 18 6" id="MySvg" version="1.1">
    <circle id="Purple" cx="3" cy="3" r="3" class="purple"></circle>
    <circle id="Blue" cx="9" cy="3" r="3" class="blue"></circle>
    <circle id="Orange" cx="15" cy="3" r="3" class="orange"></circle>
  </svg>
</div>
Not much to see here, With {{enteredanswer}} you can access the ID of the SVG element that was clicked by the user. I used a different text string for reviews and lessons because you can flip the card without actually clicking something in the lessons, which leaves the {{enteredanswer}} string for the user to see.
5. The Styling
#MySvg {
  width: 70%;
  margins: auto;
  padding: 20px;
}
.purple {
  fill: purple;
  stroke: purple;
  stroke-width: 0.1;
}
.blue {
  fill: blue;
  stroke: blue;
  stroke-width: 0.1;
}
.orange {
  fill: orange;
  stroke: orange;
  stroke-width: 0.1;
}
.kitsun-click:hover {
  stroke: white;
  transition: all 1.5s ease;
}
.lessons .inreviews {
  display: none;
}
.reviews, .quiz {
  .inlessons {
    display: none;
  }
}
.back .correctclick {
  stroke: limegreen;
}
.correct_card .inreviews {
  color: black;
  background-color: limegreen;
}
.wrong_card {
  .clickedanswer {
    stroke: red;
  }
  .inreviews {
    color: black;
    background-color: red;
  }
}
The styling gives the colors to the circles, shows off a simple hover animation, handles the lesson/review string visibility, and marks the circles either red or green, depending on where you clicked.
Kitsun will automatically assign the .correctclick class to the correct solutions, and .clickedanswer to what the user clicked. Kitsun already sets this on the front side, so we need to wrap it with .back or .wrong_card not to leak the answer 
6. Create a Deck
Time to test the layout! Go to Decks and click the + in the corner to create an SVG Tutorial deck. Then Manage Cards, and + again. Make a card with our template and layout and store it.
7. Finished!
And then we are already finished! Take the lesson, or select the card in Manage Cards and do Actions>Quick Study to see the animation and reaction to your clicks in action!
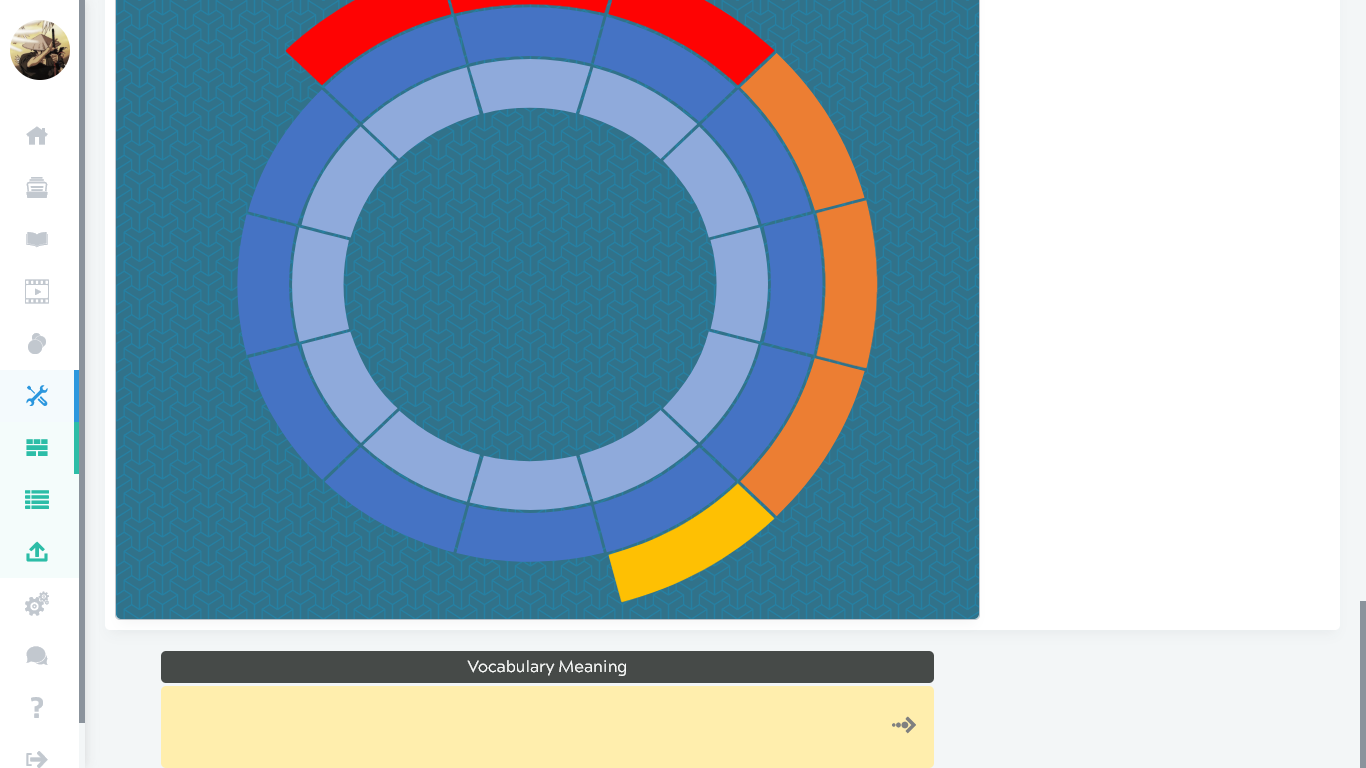
Misc
There is another feature not mentioned here: you can use {{addclass:answer_id}} to style the correct answers, for example in “please type the color of the highlighted circle” kind of questions. This adds the class .customstyle to your elements.